Friday, October 27, 2006

How to send a remote xmessage to a desktop GUI

export DISPLAY=:0.0

xmessage -center "Revisa tu Gmail.. " -buttons ok
or
zenity --title "Atencion" --warning --text "Checa tu gmail... \n\n\nJACH"
or (with sound)
kdialog --warningyesno "Revisa tu Gmail.. \n\n\nJACH "
####################

using GUI dialog box

Every GUI program has its command line, even dialog boxes too. zenity for gnome, kdialog for KDE, xmessage for other windows managers, etc.

In this example I am going to show you examples of xmessage and zenity.

xmessage is a very simple dialog box which uses by fluxbox, it allows you to define your text and buttons. Let say I want to create a shutdown script, before execute the shutdown, I would like to ask for comfirmation.

xmessage  "Are you sure you want to shutdown? " -buttons yes,no

This will shows a simple dialog with 2 buttons, if user click yes, it returns 101, if no returns 102. To check the return value, do this

echo $?

You can ask xmessage to return the button label string, so you can store the label and manipulate the function.

answer=$(xmessage "Are you sure you want to shutdown? " -buttons yes,no -print)

User click yes, answer will store “yes”. Checks the value with echo

echo $answer

zenity is more complete, it support various dialogs, question, notification, calendar, error etc. My example make use of question.

To load various types of dialog, just specified the types. Check the types by –help or simple man zenity. For this case, I want to use –question.

zenity --question --text "Are you sure you want to shutdown?"

The question dialog for zenity consist of “ok” and “cancel” buttons. Its button and return value are fixed. When user click “ok” it returns 0, “cancel” returns 1.

zenity allows you to specified you title.

zenity --title "Shutdown Comfirmation"
--question --text "Are you sure you want to shutdown?"


#############################################

shutdown script using xmessage or zenity

,

Uses xmessage
#!/bin/sh
# Say bye to shutdown your pc

#uses xmessage to ask first.
answer=$(xmessage "Are you sure you want to shutdown? " -buttons yes,no -print)
if [ $answer = "yes" ]
then
# Do shutdown at here.
#Ubuntu probably needs gksudo instead of sudo
sudo init 0;
fi

Uses zenity
#!/bin/sh
# Say bye to shutdown your pc

#uses zenity to ask first.
zenity --question --title "Shutdown Confirmation" \
--text "Are you sure you want to shutdown?"

if [ "$?" -eq "0" ]
then
# Do shutdown at here.
#Ubuntu probably needs gksudo instead of sudo
sudo init 0;
fi
#########################################

Tuesday, October 03, 2006

HOWTO Replace RedHat with Gentoo, Remotely over SSH

Author: Jordan Ritter (jpr5 at darkridge dot com) (Link)

Introduction

What is this?

This is a HOWTO that describes how to take a stock RedHat9 system and convert it to Gentoo, remotely over ssh and while it is running. These instructions have been tested with RedHat9, but very likely apply to everything from RedHat9 down to RedHat 7.2, and include everything from advice and gotchas around how to get another distribution installed over RedHat while it is running, to strategies for cleaning up the system of unused files once the transformation is complete.

Why do that?

While everyone has their own tastes in Linux distributions and installed software, there are frequently times when one doesn't have a real choice, and only the most popular distributions prevail. For example, remote ISPs that offer leasable colocated systems will provide only a short list of the most common Linux distros for pre-installation, and while it's almost a sure thing that RedHat is on that list, there is no guarantee that your favorite one is.

I had a remotely colocated server installed with RedHat9 that I had no physical access to. I love Gentoo, though, and so through much trial and tribulation (and about 80 vmware checkpoints) I figured out how to fulfull the Gentoo dream without needing to access the physical console.

Does it really work?

Yes, it really works! It probably seems a bit scary, but I have tried this process now a dozen times and the only problems I've ever had were the result of typo mistakes that can easily be avoided with more careful attention. No more RedHat9 on my systems -- all are 100% pure Gentoo now, baby!

Wait... I have questions about Gentoo..

This HOWTO assumes a basic knowledge of Gentoo. Some time is taken to explain the finer points and possible pitfalls and gotchas, but to successfully install Gentoo Linux really requires ready access to the Gentoo Installation Documentation, in addition to this document. Print it out in advance or have it handy before doing this.

OK, I'm ready. I can sue if this doesn't work, right?

Nope.

THESE INSTRUCTIONS ARE PROVIDED AS-IS AND WITHOUT WARRANTY. ALL USERS ACCEPT FULL RESPONSIBILITY AND LIABILITY IN THE EVENT OF SYSTEM FAILURE, DATA LOSS, OR ANY OTHER FAILURE OR LOSS RESULTING FROM THESE INSTRUCTIONS.

Phew, ok! Here we go!

The General Strategy

In summary, the transformation process is actually fairly simple. Since Gentoo, once unpacked, will run its own binaries from its own libraries, all we're really doing is unpacking Gentoo on top of RedHat without wiping out our remote access mechanism (sshd), then removing the old RedHat files.

The entire process can be distilled down into the following simple steps:

  1. Preparation -- Make copies of important files and configuration items, Download Gentoo tarballs, Get sshd running without PAM, and Tag old files for later removal;
  2. Installation -- Unpack Gentoo tarballs, Re-add important files and configuration items, Remove the old RedHat libc and related files, Synchronize Portage, and proceed with a normal Gentoo install;
  3. Clean-up -- Remove old RedHat files, and Secure the system.
See? Easy!

Step 1: Preparation

There are several things that need to be prepared before actually starting the transformation process. Create a directory on a partition you have plenty of space on and don't intend to touch (like ``/tmp/gentoo''), and use that to store temporary files and such, as explained below.

Again, please have handy in some form the Gentoo Installation Documentation, as this HOWTO won't take the time to explain the various Gentoo-specific concepts in detail.

All instructions assume the user is logged in as ``root''.

  1. Compile a kernel with relevant driver support compiled-in.

    Just to be on the safe side, you should compile a fully-static kernel. In other words, we want a kernel that will run the system that has no externel module dependencies. When we start removing libraries and old files and such, it is quite possible we might accidentially rm something that those exceedingly tedious RedHat kernels rely on. Just compile your own and make sure your system boots and runs from it before you even start this process. I suggest sticking with 2.4.x for now so as not to complicate things.

    NOTE: I suggest not enabling devfs support just yet. Gentoo can still boot without it, and it's better to have a kernel that can boot both systems RedHat + Gentoo than one that may only be able to boot under Gentoo (dunno how well RedHat supports devfs out-of-the-box).

    Also, just to be safe, copy the kernel (again, after you've tested it) to the safe directory where you're keeping copies of things.

  2. Turn off PAM in OpenSSH's sshd_config file.

    Just like with the kernel, we have to be careful about the differences between the PAM setup in RedHat and the PAM setup in Gentoo. You don't need PAM in order for the thing to function, so regardless of whether you like it or not just disable it so as to ensure you'll be able to login again.

    Best way to do this is:

    1. Modify ``/etc/ssh/sshd_config'', set ``UsePAM'' to ``no'', save the file.
    2. Run ``netstat -tanp | grep LISTEN | grep sshd'', and note the sshd PID.
    3. Kill sshd with ``kill PID'', where you got the PID from the previous step. This will only kill the listening sshd, and will not affect any already-connected sessions.
    4. Without logging out, run ``/usr/sbin/sshd''.
    5. Separate from your current logged-in session, try to re-ssh back into the box.

    If you get back in, you're fine on this step.

    Most folks will have no problem with this. If you do experience problems, consult ``/var/log/messages'', and in the worst-case scenario run sshd in the foreground with debugging turned on. That should give you enough detail about what's going on to figure out how to get things running fine.

  3. Download the latest snapshots/stage3 tarball.

    The only thing you need is the latest stage3 tarball. Make sure to decide ahead of time what platform architecture you are using (x86, pentium3, pentium4, etc), as that's an obvious benefit of Gentoo that you'll want to take advantage of. For the purposes of this HOWTO, we assume the safe ``x86'' architecture.

    You can find a full list of Gentoo mirrors at http://www.gentoo.org/main/en/mirrors.xml. As of this writing, the most recent stage3 tarball is:

       ftp://distro.ibiblio.org/pub/linux/distributions/gentoo/releases/x86/2004.2/stages/x86/stage3-x86-2004.2.tar.bz2

  4. Make copies of important files and information.

    Copy the following files to your safe location:

    • /etc/resolv.conf
    • /etc/fstab,mtab
    • /etc/passwd,shadow,group
    • /etc/grub.conf,lilo.conf
    • /etc/sysconfig/network
    • /etc/sysconfig/network-scripts/ifcfg-eth*

    Additionally, take a quick snapshot of what modules are loaded, for later inspection, with ``/sbin/lsmod > /tmp/gentoo/modules.txt''.

  5. Mark all current files with a special date.

    Assuming the author isn't on crack, how would one know what files to delete after the Gentoo installation overlays the RedHat one? Easy! Set the timestamp on all files to a special date before proceeding. I used my birthday!

    First of all, we need to be careful about touching all files, because the kernel will detect accesses to ``/dev'' and try to autoload modules for things that you may not have present or installed, which will make things take a lot longer. So first we temporarily disable modprobe by moving it out of the way, and then move it back when we're done. Also, some filenames and directories have spaces in them, so we need to be careful of that also.

            mv /sbin/modprobe /sbin/.modprobe
    find / | perl -wpe 's/ /\\ /g' | xargs touch -d "Feb 1 1978" -m -a
    mv /sbin/.modprobe /sbin/modprobe

Step 2: Installation

OK! So now it's time to take the dive. Yes, it's a little scary, but follow these instructions and you should be fine.

First, the most effective way to conduct this installation is with two (2) shells, both at or su'd to the root user. We'll call the first shell the "setup" shell and the second shell the "repair" shell. Let's assume that you used "/tmp/gentoo" as the safe directory to store copies of downloaded files and important files and configuration items.

  1. From the "setup" shell: Unpack the stage3 tarball onto the root partition.

    cd / && tar jxvf /tmp/gentoo/stage3-*.tar.bz2

  2. Synchronize Portage.
    emerge sync

  3. While the portage synchronization is happening, continue on by completing the following operations from the "repair" shell:

    • Re-set the root password. This is because the stage3 tarball replaced your password and shadow file.

    • Re-add your own username/account.

      /usr/sbin/useradd $myuser

    • Re-chown your home directory. Your account's UID has changed between RedHat's and Gentoo's numbering schemes.

      chown -R $myuser:users /home/$myuser

    • Add your user account to the wheel group in ``/etc/group'', so you can ``su''.

    IMPORTANT: At this point, test that you can ssh back into the box. You may have to restart the listening sshd server, but that's unlikely.

    • Re-add any other necessary account info, referencing ``/tmp/gentoo/passwd,shadow,group'' files. If any UIDs or GIDs change between the old files vs. the new, make sure to run chown across the filesystem to adjust them.

      find / -uid $olduid |  perl -wpe 's/ /\\ /g'  | xargs chown $newusername

    • Copy back ``/etc/fstab''. Also suggest removing the "LABEL=" stuff, which I believe is a concept introduced by RedHat.
    • Fix ``/etc/grub.conf'' or ``/etc/lilo.conf'' depending on which you use.
    • Optional: Remove RedHat's bash aliases from ``/root/.bashrc''.
    • Edit ``/etc/make.conf''.
      • Add ``MAKEOPTS="-j2"''
      • Define your favorite settings. Please see the Gentoo Installation Guide for details.
    • Fix Network Configuration.
      • Edit ``/etc/conf.d/net''.
        • Set ``iface_eth0'', ``gateway''.
      • Run: ``rc-update add net.eth0 default''.
    • Edit ``/etc/rc.conf''.
      • Optional: Set KEYMAP (suggest ``emacs'' to turn capslock into control key).
      • Set ``CLOCK'' to "local".
      • Set ``EDITOR'' to "/usr/bin/vi" or "/usr/bin/emacs", depending on preference.
    • Set the system locale. For instance, if you live on the West Coast: ``ln -sf /usr/share/zoneinfo/US/Pacific /etc/localtime''.
    • (Temporarily) add ``/usr/bin/sshd'' to ``/etc/conf.d/local.start''.
    • Set the hostname: ``echo some_hostname > /etc/hostname''.
    • Switch from RedHat's system libraries to Gentoo's. Run: ``cd /lib && rm -rf i686 && /sbin/ldconfig''.

    By this point, you will be completely off of RedHat's system binaries and libraries and on Gentoo's. Now we must install some basic system components before we reboot and clean up.

  4. (Re-)Add basic system components:
    • System Logger: ``emerge sysklogd''
    • Cron Daemon: ``emerge dcron''
    • Fix termcap, otherwise backspace in vi and emacs will be screwed up: ``emerge libtermcap-compat''

    Install any other utilities you would like to have before rebooting. At the very least, you should (re-)install the minimum of things you don't want deleted:

    • grub or lilo (to overwrite RedHat's so that it doesn't get deleted later)
    • openssh (remember to ``rc-update add sshd default'' and remove the ``/etc/conf.d/local.start'' entry afterwards)
    • emacs and/or vi (for a usable editor, I personally don't like nano)
And that's it! Now you're ready to reboot and come back up on Gentoo. At this point the best thing to do is go over your configuration and make sure you have the important things covered before you reboot:
  1. That the bootloader is properly configured to point to your preferred, working kernel.
  2. That your kernel supports the necessary drivers to properly boot the network interface.
  3. That the Gentoo network configuration looks correct and doesn't have any typos.
  4. That your fstab is correct and the right file systems will be mounted at boot time.
  5. That you can login to the system remotely, and that you can su to root.
  6. That the remote access mechanism, openssh, is configured properly to load at boot time. This can be via ``/etc/conf.d/local.start'' or the ``rc-update'' mechanism.

When you're ready, reboot your system: ``shutdown -r now''.

Step 3: Clean-up

The remaining tasks revolve around cleaning up the old RedHat files that Gentoo is not going to use (to get that disk space back), and a few OS security hardening items that can't hurt.

If you're like me, you install the minimum amount of software components necessary to run the system. If however you like installing lots of other things, then keep in mind that you need to consider the spirit of the following instructions rather than the literal directions, as you may have other components you'll want to isolate or protect.

  1. Protect certain files and directories.

    Before we install any more software, we need to take advantage of the timestamp magic from the Preparation Step and nuke all the old files. But before we do that, there are some directories and files we want to make sure are protected no matter what. The following is a command line that touches the timestamps of various files, and it should be good enough if you haven't done anything beyond the scope of these instructions.

    for dir in /lib/modules /etc/ssh ; do \
    find $dir | perl -wpe 's/ /\\ /g' | xargs touch -m -a ; \
    done

    for file in /etc/resolv.conf ; do \
    touch -m -a $file; \
    done

  2. Remove old RedHat files

    Recall that we ``touch''ed the entire file system back in the Preparation Step. This was to make it easy to find them after the installation -- the Gentoo steps would overwrite whatever files were in common with RedHat, thereby updating their timestamps, while the files that were untouched would retain the old timestamp. Now we'll run a ``find'' looking for directories and files older than a certain number of days, and then ``rm'' them.

    NOTE: the ``9125'' number below references the number of days since my birthday, which again was the date I chose in the Preparation Step. If you chose a different date, you need to adjust this number accordingly.

    find /bin /sbin /etc /lib /usr /var -type f -mtime +9125 | perl -wpe 's/ /\\ /g' | xargs rm -v
    find /bin /sbin /etc /lib /usr /var -type d -mtime +9125 | perl -wpe 's/ /\\ /g' | xargs rm -vrf

    Doing this will screw up the installation of groff (man) and emacs. I'm not sure how, but the solution is simple and easy enough so instead of drilling down to figure this out, I just provide you with the solution:

    emerge groff
    emerge emacs
    emerge vi

    See? Simple.

  3. Optional: Remove old RedHat devices and special files.

    In the interest of being complete, we also want to consider wiping out any and all "special" files (devices, pipes, sockets, etc) from RedHat that Gentoo doesn't use. Again, remember that the timestamps will be recent if the Gentoo Installation overwrote any of the files, so you should be safe.

    NOTE: I did not do this step. I don't know if it works, but there won't be much disk space to recover from this step and it just wasn't important to me in light of the fact that the Gentoo system prefers to use DevFS and will take over the ``/dev'' directory.

    find /dev -type b -mtime +9125  | perl -wpe 's/ /\\ /g' | xargs rm -v
    find /dev -type c -mtime +9125 | perl -wpe 's/ /\\ /g' | xargs rm -v
    find /dev -type p -mtime +9125 | perl -wpe 's/ /\\ /g' | xargs rm -v
    find /dev -type s -mtime +9125 | perl -wpe 's/ /\\ /g' | xargs rm -v

  4. Remove old RedHat directories

    If they are empty, you should nuke all the other RedHat directories.

    cd / && rm -rf opt misc tftpboot

    Once you're off of the RedHat kernel, you should ``rmdir /initrd'' as well.

    IMPORTANT: don't nuke the initrd directory, even if it's empty, if you're still on the RedHat kernel -- the RedHat kernel boot will fail and hang when it goes to mount the initrd image if the mount point is missing.

  5. Secure the system.

    As a general practice, I don't like my users doing much on a system beyond what I have specifically provided for them. To that end, I favor limiting the permissions of standard system components, because you never know what's going to become a security risk.

    1. Limit permissions of SUID/SGID binaries.

      for file in /usr/bin/suidperl /usr/bin/sperl5.* /usr/bin/chage /usr/bin/gpasswd                 \
      /usr/bin/crontab /usr/bin/chfn /usr/bin/chsh /usr/bin/newgrp /usr/sbin/traceroute \
      /usr/bin/traceroute6 /bin/ping /bin/ping6 /bin/mount /bin/umount /usr/bin/write; do \
      chmod o-rwx $file; chgrp wheel $file; chmod g-r $file ; \
      done

    2. Limit permissions of system components that users shouldn't need to run.

      for file in /usr/bin/*cc* /usr/bin/*86* /usr/bin/tracepath* /usr/bin/sudo /usr/sbin/*del \
      /usr/bin/i386-pc-linux-gnu-* /usr/bin/?++ /usr/i386-pc-linux-gnu/bin/* \
      /usr/i386-pc-linux-gnu/gcc-bin/3.*/* /usr/sbin/*add /usr/sbin/*mod ; do \
      chmod o-rwx $file; chmod g-rw $file; chgrp wheel $file; \
      done

If you want to recompile parts of the OS, now's the time! Install those missing components, emerge whatever you want. You're done!

Monday, September 25, 2006

Command find

EXAMPLES

find -name 'mypage.htm'

In the above command the system would search for any file named mypage.htm in the current directory and any subdirectory.

find / -name 'mypage.htm'

In the above example the system would search for any file named mypage.htm on the root and all subdirectories from the root.

find -name 'file*'

In the above example the system would search for any file beginning with file in the current directory and any subdirectory.

find -name '*' -size +1000k

In the above example the system would search for any file that is larger then 1000k.

Here then is an example of how to search in the current directory and all subdirectories for files ending with the the extensions ".class" and ".sh" using the Unix find command:

find . -type f \( -name "*.class" -o -name "*.sh" \)

That should work on all types of Unix systems, including vanilla Unix, Linux, BSD, freeBSD, AIX, Solaris, and Cygwin.

While I'm in the neighborhood, here is an example of how to search the current directory for files that end in any of three different files extensions:

find . -type f \( -name "*cache" -o -name "*xml" -o -name "*html" \)

(FWIW, I did that one on a Mac OS/X machine.)

In these examples I always include the "-type f" option, which tells find to only display files, and specifically not directories. That's not always necessary, but when someone tells me they want to find files, I always include it.

The grep Command

The grep command is useful for finding specific character strings in a file. For example, if you want to find every reference made to "coffee" in the file sneakers.txt, you would type:

grep coffee sneakers.txt

You would see every line in that file where the word "coffee" is found.

Grep is one such tool. Let's say for example we wanted to find where
pid_t is defined. We could issue:

os161-1.10.original/kern]$ grep -irnH pid_t *

find tools
find commands

################

##Perl Script to find phrases in any file inside a directory or subdirectory

#!/bin/bash
# findstring.sh:
# Find a particular string in binaries in a specified directory.

directory=/home/jacarde1/
fstring="characters" # Here write the word you want to find.

for file in $( find $directory -type f -name '*' | sort )
do
strings -f $file | grep "$fstring" | sed -e "s%$directory%%"
# In the "sed" expression,
#+ it is necessary to substitute for the normal "/" delimiter
#+ because "/" happens to be one of the characters filtered out.
# Failure to do so gives an error message (try it).
done

exit 0
#################################################
grep smug files{search files for lines with 'smug'}
grep '^smug' files{'smug' at the start of a line}
grep 'smug$' files{'smug' at the end of a line}
grep '^smug$' files{lines containing only 'smug'}
grep '\^s' files{lines starting with '^s', "\" escapes the ^}
grep '[Ss]mug' files{search for 'Smug' or 'smug'}
grep 'B[oO][bB]' files{search for BOB, Bob, BOb or BoB }
grep '^$' files{search for blank lines}
grep '[0-9][0-9]' file{search for pairs of numeric digits}
grep '^From: ' /usr/mail/$USER{list your mail}
grep '[a-zA-Z]'{any line with at least one letter}
grep '[^a-zA-Z0-9]{anything not a letter or number}
grep '[0-9]\{3\}-[0-9]\{4\}'{999-9999, like phone numbers}
grep '^.$'{lines with exactly one character}
grep '"smug"'{'smug' within double quotes}
grep '"*smug"*'{'smug', with or without quotes}
grep '^\.'{any line that starts with a Period "."}
grep '^\.[a-z][a-z]'{line start with "." and 2 lc letters}
% grep BOB tmpfile{search 'tmpfile' for 'BOB' anywhere in a line}
% grep -i -w blkptr * {search files in CWD for word blkptr, any case}
% grep run[- ]time *.txt{find 'run time' or 'run-time' in all txt files}
% who | grep root {pipe who to grep, look for root}

egrep example
$ egrep ' paper | people ' fortunes
Line printer paper is strongest at preforations.
Man Year: 730 people working feverishly until noon.
Nudists are people who wear one-button suits.
$

Examples

To use an extended pattern that contains some of the pattern-matching characters +, ?, |, (, and ), enter:

egrep "\( *([[:lower:][:upper:]]*|[:digit:]*\)" my.txt

This displays lines that contain letters in parentheses or digits in parentheses, but not parenthesized letter-digit combinations. It matches (y) and (783902), but not (alpha19c).

Note: When using the egrep command, \ ( (backslash followed by open parenthesis) or \ ( (backslash followed by close parenthesis) match parentheses in the text, but ( (open parenthesis) and ) (closed parenthesis) are special characters that group parts of the pattern. The reverse is true when using the grep command.

Let say you want to search for string fprintf, vprintf and sprintf using grep, usually what you do is

egrep "fprintf|vprintf|sprintf" *.c

You may be ask why don’t just uses the word “printf”? If uses the word printf, it will return all of them but also include printf itself. But in this case i don’t want to grep other printf besides f,v,s printf. Thats the square brackets comes in to lessen your trouble.

egrep "[sfv]printf" *.c

It simply return the result with any character specified in [ ] with word printf concatenated.

The square brackets can be used with other RE symbols, here is another example, let say I want to gets all lists with words start with a character “a to f”, I can do this

egrep "^[a-f]" com-book.txt

It is case sensitive, I want all a to f including the upper case A to F.

egrep "^[a-fA-F]" com-book.txt

Thursday, September 21, 2006

Monday, September 18, 2006

< The list of Vim commands >

Working with files
Vim command Action
:e filename Open a new file. You can use the Tab key for automatic file name completion, just like at the shell command prompt.
:w filename Save changes to a file. If you don't specify a file name, Vim saves as the file name you were editing. For saving the file under a different name, specify the file name.
:q Quit Vim. If you have unsaved changes, Vim refuses to exit.
:q! Exit Vim without saving changes.
:wq Write the file and exit.
:x Almost the same as :wq, write the file and exit if you've made changes to the file. If you haven't made any changes to the file, Vim exits without writing the file.
These Vim commands and keys work both in command mode and visual mode.
Vim command Action
j or Up Arrow Move the cursor up one line.
k or Down Arrow Down one line.
l or Right Arrow Right one character.
h or Left Arrow Left one character.
e To the end of a word.
E To the end of a whitespace-delimited word.
b To the beginning of a word.
B To the beginning of a whitespace-delimited word.
0 To the beginning of a line.
^ To the first non-whitespace character of a line.
$ To the end of a line.
H To the first line of the screen.
M To the middle line of the screen.
L To the the last line of the screen.
:n Jump to line number n. For example, to jump to line 42, you'd type :42
Inserting and overwriting text
Vim command Action
i Insert before cursor.
I Insert to the start of the current line.
a Append after cursor.
A Append to the end of the current line.
o Open a new line below and insert.
O Open a new line above and insert.
C Change the rest of the current line.
r Overwrite one character. After overwriting the single character, go back to command mode.
R Enter insert mode but replace characters rather than inserting.
The ESC key Exit insert/overwrite mode and go back to command mode.
Deleting text
Vim command Action
x Delete characters under the cursor.
X Delete characters before the cursor.
dd or :d Delete the current line.
Entering visual mode
Vim command Action
v Start highlighting characters. Use the normal movement keys and commands to select text for highlighting.
V Start highlighting lines.
The ESC key Exit visual mode and return to command mode.
Editing blocks of text
The Vim commands marked with (V) work in visual mode, when you've selected some text. The other commands work in the command mode, when you haven't selected any text.
Vim command Action
~ Change the case of characters. This works both in visual and command mode. In visual mode, change the case of highlighted characters. In command mode, change the case of the character uder cursor.
> (V) Shift right.
< (V) Shift left.
c (V) Change the highlighted text.
y (V) Yank the highlighted text. In Winblows terms, "copy the selected text to clipboard."
d (V) Delete the highlighted text. In Winblows terms, "cut the selected text to clipboard."
yy or :y or Y Yank the current line. You don't need to highlight it first.
dd or :d Delete the current line. Again, you don't need to highlight it first.
p In Winblows terms, "paste" the contents of the "clipboard". In Vim terms, you "put" the text you yanked or deleted. Put characters after the cursor. Put lines below the current line.
P Put characters before the cursor. Put lines above the current line.
Undo and redo
Vim command Action
u Undo the last action.
U Undo all the latest changes that were made to the current line.
Ctrl + r Redo.
Vim command Action
/pattern Search the file for pattern.
n Scan for next search match in the same direction.
N Scan for next search match but opposite direction.
Replace
Vim command Action
:rs/foo/bar/a Substitute foo with bar. r determines the range and a determines the arguments.
The range (r) can be
nothing Work on current line only.
number Work on the line whose number you give.
% The whole file.
Arguments (a) can be
g Replace all occurrences in the line. Without this, Vim replaces only the first occurrences in each line.
i Ignore case for the search pattern.
I Don't ignore case.
c Confirm each substitution. You can type y to substitute this match, n to skip this match, a to substitute this and all the remaining matches ("Yes to all"), and q to quit substitution.
Examples
:452s/foo/bar/ Replace the first occurrence of the word foo with bar on line number 452.
:s/foo/bar/g Replace every occurrence of the word foo with bar on current line.
:%s/foo/bar/g Replace every occurrence of the word foo with bar in the whole file.
:%s/foo/bar/gi The same as above, but ignore the case of the pattern you want to substitute. This replaces foo, FOO, Foo, and so on.
:%s/foo/bar/gc Confirm every substitution.
:%s/foo/bar/c For each line on the file, replace the first occurrence of foo with bar and confirm every substitution.

Linux help > Tips and cheat sheets > The Vim commands cheat sheet

Handling GCC in Gentoo

http://gentoo-wiki.com/HOWTO_Migrate_to_GCC_3.4

Gentoo Linux Kernel Upgrade Guide

http://www.gentoo.org/doc/en/kernel-upgrade.xml

Sunday, September 17, 2006

Aguila server (updating gentoo)

aguila acardh # emerge --update --ask world

!!! Your current profile is deprecated and not supported anymore.
!!! Please upgrade to the following profile if possible:
default-linux/x86/2006.1/desktop

To upgrade do the following steps:
# There are several possible profiles that you can use to replace this one.

# default-linux/x86/2006.1
# default-linux/x86/2006.1/desktop
# default-linux/x86/2006.1/server
# default-linux/x86/no-nptl
# default-linux/x86/no-nptl/2.4

# By default, we use the desktop profile.

# emerge -n '>=sys-apps/portage-2.0.51'
# cd /etc
# rm make.profile
# ln -s ../usr/portage/profiles/default-linux/x86/2006.1/desktop make.profile

# This profile is deprecated and will be removed on or after November 1, 2006
====================
Automated
(View available profiles)
# eselect profile list

(Select the number of your desired profile from the list)
# eselect profile set
========

Gentoo Upgrade

http://www.gentoo.org/doc/en/handbook/handbook-x86.xml?part=2&chap=1

http://www.gentoo.org/doc/en/gentoo-upgrading.xml

Updating your System

To keep your system in perfect shape (and not to mention install the latest security updates) you need to update your system regularly. Since Portage only checks the ebuilds in your Portage tree you first have to update your Portage tree. When your Portage tree is updated, you can update your system with emerge --update world. In the next example, we'll also use the --ask switch which will tell Portage to display the list of packages it wants to upgrade and ask you if you want to continue:

Code Listing 13: Updating your system

# emerge --update --ask world 

Portage will then search for newer version of the applications you have installed. However, it will only verify the versions for the applications you have explicitly installed - not the dependencies. If you want to update every single package on your system, add the --deep argument:

Code Listing 14: Updating your entire system

# emerge --update --deep world 

Since security updates also happen in packages you have not explicitly installed on your system (but that are pulled in as dependencies of other programs), it is recommended to run this command once in a while.

If you have altered any of your USE flags lately you might want to add --newuse as well. Portage will then verify if the change requires the installation of new packages or recompilation of existing ones:

Code Listing 15: Performing a full update

# emerge --update --deep --newuse world 

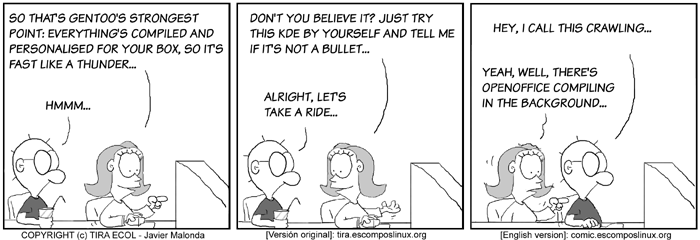
Tira Cómica


Comic strip